Project Overview
This project was developed as part of the university course CS-341: Computer Graphics at EPFL. The framework used for this project was developed by Michele Vidulis, Vicky Chappuis and Krzysztof Lis.
The following project was a group project in the course CS-341: Computer Graphics, with the following members:
- Yann Gaspoz
- Thomas Picart
- Alain Sinzig
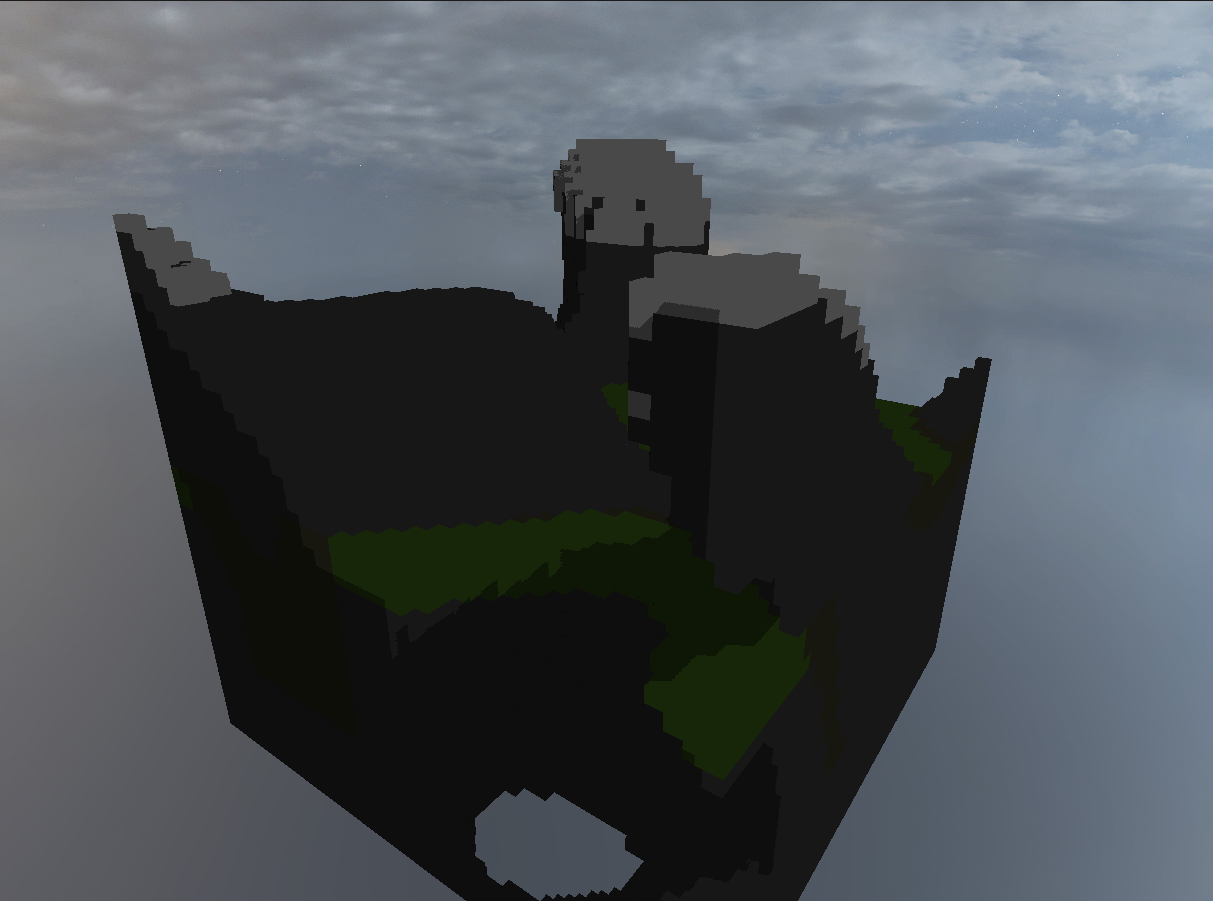
The project aims to generate the ideal living situation of a groundhog. The terrain is generated using Perlin noise. A groundhog mesh is created using blender. To highlight the cuteness of the groundhogs, the scene can be displayed with a toon shader. The groundhogs love a scenic lake, which is simulated using a wave simulation. Sometimes, it’s also quite foggy in the groundhog paradise, which the groundhogs love as it gives them a bit of well-deserved privacy.
In this blog-post however, only perlin noise is presented, as this was the part of the project I mostly focused on.
Noise Function for 3D Terrain Generation
Implementation
The terrain generation uses a 3D implementation of Perlin noise, implemented in JavaScript and computed by the CPU.
The 3D Perlin noise generator computes a value for each point in a 3D grid.
Perlin Noise implementation
The Perlin noise algorithm in 3D works the following way:
-
A grid is defined with (pseudo-)random gradient vectors generated for each point. We have a list of pre-defined 3D gradient vectors from the
noise.jslibrary (linked in the references section). -
Select 8 points with an offset to the current point in the grid:
let c_1 = [ Math.floor(x), Math.floor(y), Math.floor(z) ]; c[0] = [c_1[0] + 0, c_1[1] + 0, c_1[2] + 0]; // 0 0 0 c[1] = [c_1[0] + 1, c_1[1] + 0, c_1[2] + 0]; // 1 0 0 c[2] = [c_1[0] + 0, c_1[1] + 1, c_1[2] + 0]; // 0 1 0 // etc... until c[7] -
For 8 points in 3D space (8 corners of a cube situated at the point):
- The dot product between the gradient vector at the distance from the point to the offset point is taken. This will be our influence value.
let grad = this.grad_func_3d(hash)
let distance = vec3.subtract(vec3.create(), [x, y, z], v);
let influence = vec3.dot(grad, distance);
- The dot product between the gradient vector at the distance from the point to the offset point is taken. This will be our influence value.
-
Interpolation between the 8 values using a fade function:
let mix_1_2 = this.mix(
    out_influence[0],
    out_influence[1],
    this.blending_weight(f[0]
));
// etc.. for every pair of values
// finally:
this.mix(mix_1_to_4, mix_5_to_8, this.blending_weight(f[2]));
It is important to choose the correct order of the interpolation, not just to mix random points. We first mix around the x-axis, then we mix the remaining 4 results around the y-axis, and finally we mix the last 2 results around the z-axis. We interpolate the values structured first in x, then y and finally z direction, ensuring we mix between every dimension.
The mixing using the blending function is done using the same formula as in the homework (t*t*t*(t*(t*6.0 -15.0)+10.0);).
The hash and mix functions are also adapted from the 2D variant.
To find the perfect Perlin noise for our terrain, we experimented with different frequencies; in the end 1.0 / 25 seemed to do the job quite well.
Terrain generation
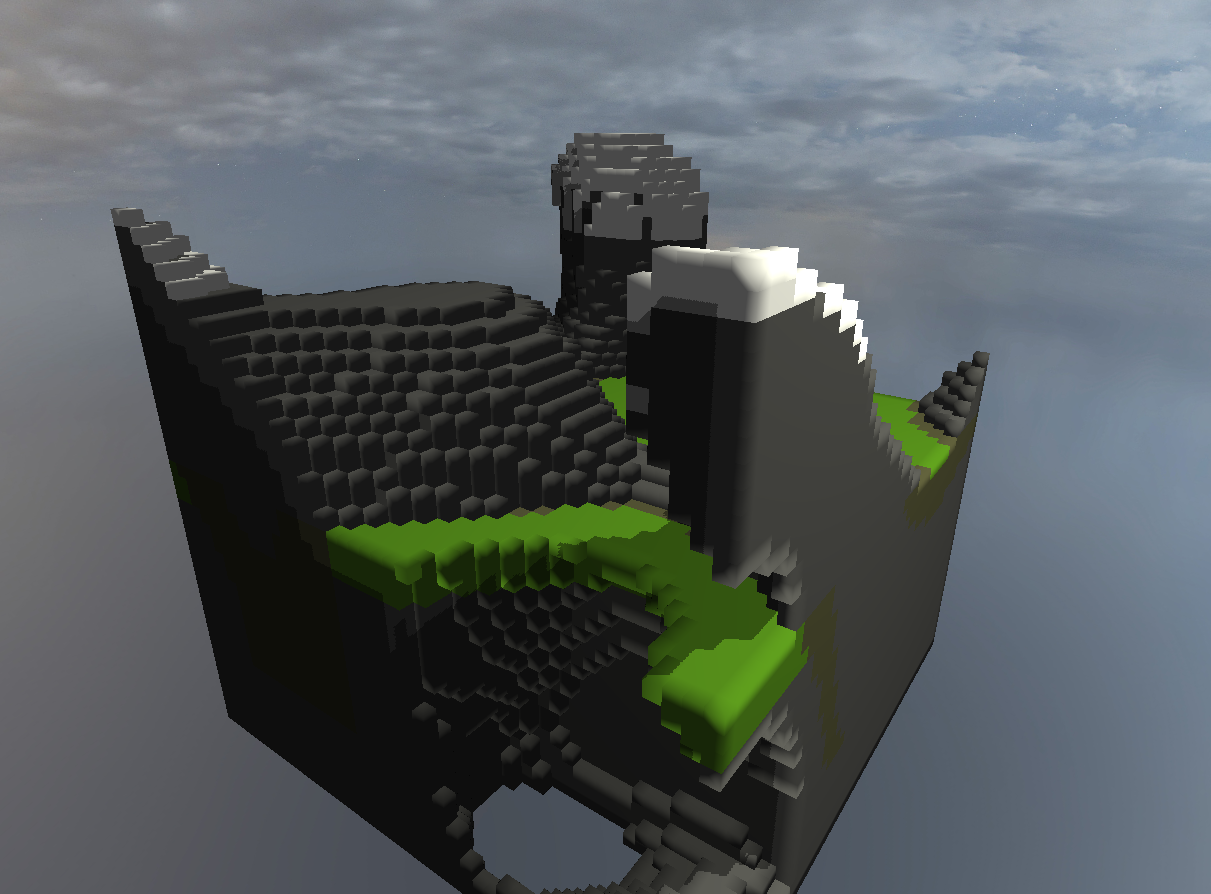
For every said Perlin value, we apply a threshold to determine if a cube is displayed at that point or not. If the value is above the threshold, we display a cube, otherwise we don’t. Depending on the height, the threshold is different, so we get mountains above a certain height as the threshold is higher:
function is_visible(visibility, height, grid_height, water_level) {
    let visible = (visibility > THRESHOLD);
    if (height > water_level) {
        visible = (visibility > (height/grid_height));
    }
    return visible;
}
This height we can adjust with a slider in the UI (named water level).
The Perlin noise value (visibility) in combination with the height is also used to determine the material of the cube:
// Grass
if (gz < water_level + 1 && gz > water_level -3) {
    material_index = 1;
}
// Dirt
if (visibility > 0.5 && water_level / 3 < gz && gz < water_level + 1) {
    material_index = 2;
}
// Stone
if (visibility > 0.7 ) {
    material_index = 0;
}
// Snow
if ( gz > snow_level +3 ||
    (visibility < (gz/grid_height)+0.03 && gz > snow_level-1))  {
    material_index = 3;
}
For every visible cube, we check the visibility of the neighboring cubes to determine which faces to draw. It would be inefficient to draw the faces of cubes that are not even visible.
Also, we return an array of potential spawn points for the groundhogs, which are just the blocks over the visible grass cubes (see scenes below for a visual representation).
To make the rendering more efficient, we have an object for every material, not just for every cube. So every plane that is visible gets added to an array of faces and vertexes, in the end these arrays are used to create a new object using the desired material. The normals are also being calculated for every object, so the shading works correctly.
Continuous Terrain Chunks
As Perlin noise is deterministic, we can use the correct offset to generate a chunk next to the current one. This is necessary for a certain terrain size, as an object has a maximum amount of vertices. In our main scene, only one chunk of terrain is generated, but in the NoiseTerrainGeneratonChunkScene we show that multiple chunks could be generated next to each other (see scenes section). In that example, the chunk barrier is visible; this is because of the normals at the edge of the chunks, rendered with blinn phong shading.
The normal could be fixed by either checking the bordering chunk or generating chunks that overlap slightly so the normals get computed correctly, but then only pushing the non-overlapping faces and verticies to the object. But as we do not need more than one chunk in the main scene, we left it as is.
Shading
As the terrain render for the demo scene does not work for our terrain, we implemented our own blinn phong shader for the terrain which is essentially copied and adapted from our homework. The existing terrain shader from the demo was disabled for our project.
Parameters
The following parameters can be adjusted in the UI:
- Seed/Offet
- Random Seed/Offet
- Show groundhog spawnpoints
- Show raw noise instead of terrain
- Set threshold for raw Perlin noise
- Water level
- Snow level
- Grid size
Scenes
- The main scene of the project can be viewed here.
- The other scenes are linked below in the description of the previews of the features.
Main scene
Multiple Continuous Terrain Chunks
Perlin Noise 3D
Perlin Noise 3D: Offset / Seed
Blinn Phong Shading

Terrain Water / Snow Level
Grid Size
Groundhog Spawnpoints
Optimization: Don’t render faces inside terrain
References
A big thank you to Michele Vidulis, Vicky Chappuis and Krzysztof Lis for providing the framework used in this project.